Fitting an under-mount sink to a Quartz surface may leave you with a feeling of dread. The Quartz surface is expensive and hard to maneuver due to the weight because quartz countertops are thinner than their counterparts of Granite or Marble one wrong move could see you breaking the countertop.
The truth is quartz countertops are artificial from agglomerated quartz and very touch resins with other substances to give a sparkle if that has been your choice.
Quartz countertops are tough, harder than granite, and stain-proof, so installing the under-mount sink is viewed as a necessary procedure.
However, the fitting is a lot simpler than first meets the eye and, with some care and attention to detail, is well within the scope of the competent DIY enthusiast.
Depending on the countertop size and your strength, it is advisable to have a helping pair of hands available.
You will only need help in the installation of the countertop, depending on the size and weight. You are the best judge of your abilities.
If one guy delivered the countertop, don’t be fooled, you will need to flip the countertop for installation and then flip again with the additional weight of the sink attached to the countertop.
The following is a step-by-step guide on how to perform the task at hand, giving the best possible results.
The First Step
Table of Contents
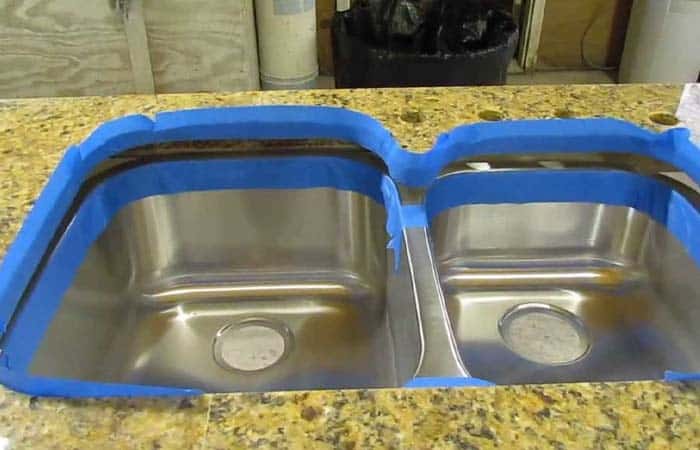
Select a marker that will quickly show the measurement marks for your under-counter sink. Flip the countertop so all markings are on the right side of the countertop.
Mark the top to the exact position of the sink for mounting, I would suggest the sink is mounted in a central position, and the markings are equally distant with the same gap around the sink.
You will need alcohol, not for drinking ( that will come later), to wipe the surface clean of any oil or grease marks. This will make a better adhesion surface and make the sink watertight.
Mark the anchor points, and double-check everything.
The Second Step
With some precision, apply the silicone adhesive, be sure the anchor points are marked on all four corners of the countertop. This is the primary support for your sink.
Be sure you have used adequate silicon, and the anchor points are in the correct position.
The Third Step
It’s now time to place the sink on to adhesive, press firmly to make a good seal and achieve the correct adhesion required.
Attach the anchor bolts in the same way. Adhesion is the key so, be sure ample silicon has been used. If you don’t have the correct amount of silicon, the adhesion will weaken and cause problems later.
The anchor bolts will have been supplied with nuts, in most circumstances, wing nuts. Screw the wing nuts onto each anchor and tighten them when tightening the bolts in a diagonal pattern for the best even adhesion. Then check the tightness one final time.
The Fourth Step
Be patient and wait for at least one hour for the sealant to cure. Please do not preempt this step; if the adhesive has not cured or dried, moving the countertop at this point will cause you to start the process over with the addition of removing the fixing adhesive, Be patient.
The Fifth and Final Step
It is now time to flip your countertop with the sink attached, you will now need to make your plumbing connections, and with the use of braided connecting hoses, this is a simple job.
You will need to turn off your mains water supply before fitting the faucet and waste connections.
You can now enjoy the beauty of your Quartz countertop and bask in the glory of knowing you have fitted that is seemingly a difficult task undertaken by a professional installer.
Quartz As a Surface For Bathrooms.
Choosing Quartz for your home is an excellent choice and has many benefits over natural stones like Granite and Marble.
Quartz is manufactured in a range of colors, and the resins used are not permeable to spills. Quartz countertops have a higher tolerance to heat than natural stone and are less prone to staging through hot pans being placed directly on the Quartz.
Maintenance is straightforward with Quartz, and a quick wipe with a damp cloth is all that is needed. Harsh detergents are not needed for cleaning and should be avoided whatever the situation.
Quartz is an order from the manufacturer via your local supplier. Measurement must be precise as alterations can be complex and need special tools to cut this super hard material.
Quartz is easier to handle than Granite or Marble due to the thickness required to make the product stable and thinner than natural stones.
Quartz can add glamour to any kitchen or bathroom being artificial. The Quartz countertop remains virtually maintenance-free, unlike Granite that needs constant attention and maintenance and resurfacing every couple of years depending on usage.
If you seek durability and a chic style for your home, then quartz is a perfect choice. The manufacturing factory completes a range of edging techniques to ensure your home looks gorgeous with a practical element needed for everyday living.
The Bottom Line
Although fixing quartz as a DIY project is often a big no due to the weight and complexity of some installations, some smaller countertops can be installed as a DIY project.
However, some caution should be exercised when determining if this is a DIY job or not.
Weight is the most significant consideration, and weight issues also apply to natural stone, if not more.
Quartz has many advantages over a natural stone, but, for the purist, it’s not stone despite the appearance, and only natural will suffice some people.
Quartz is an excellent option in cost per square meter, being cheaper or more competitive than natural Granite or Marble products.